Have you ever scrambled through a messy bathroom drawer looking for a bandage while holding a bleeding finger? Most of us have been there. We tend to rely on those cheap, plastic store-bought kits tucked behind extra shampoo bottles, assuming they will save the day when something goes wrong.
The reality is stark. More than 30 million medically consulted injuries happen in American homes each year.¹ In fact, one in eleven people gets hurt at home annually. That is higher than injuries from workplaces, public spaces, and car crashes combined. When an accident strikes, searching through expired cream and dried-up adhesive strips is the last thing you want to do.
Building a home first-aid kit is simple and practical care. Knowing you have the exact tool to handle a burn, a deep cut, or a sudden fever brings genuine peace of mind. To get there, you need to move past standard off-the-shelf boxes and build a kit tailored to your household.
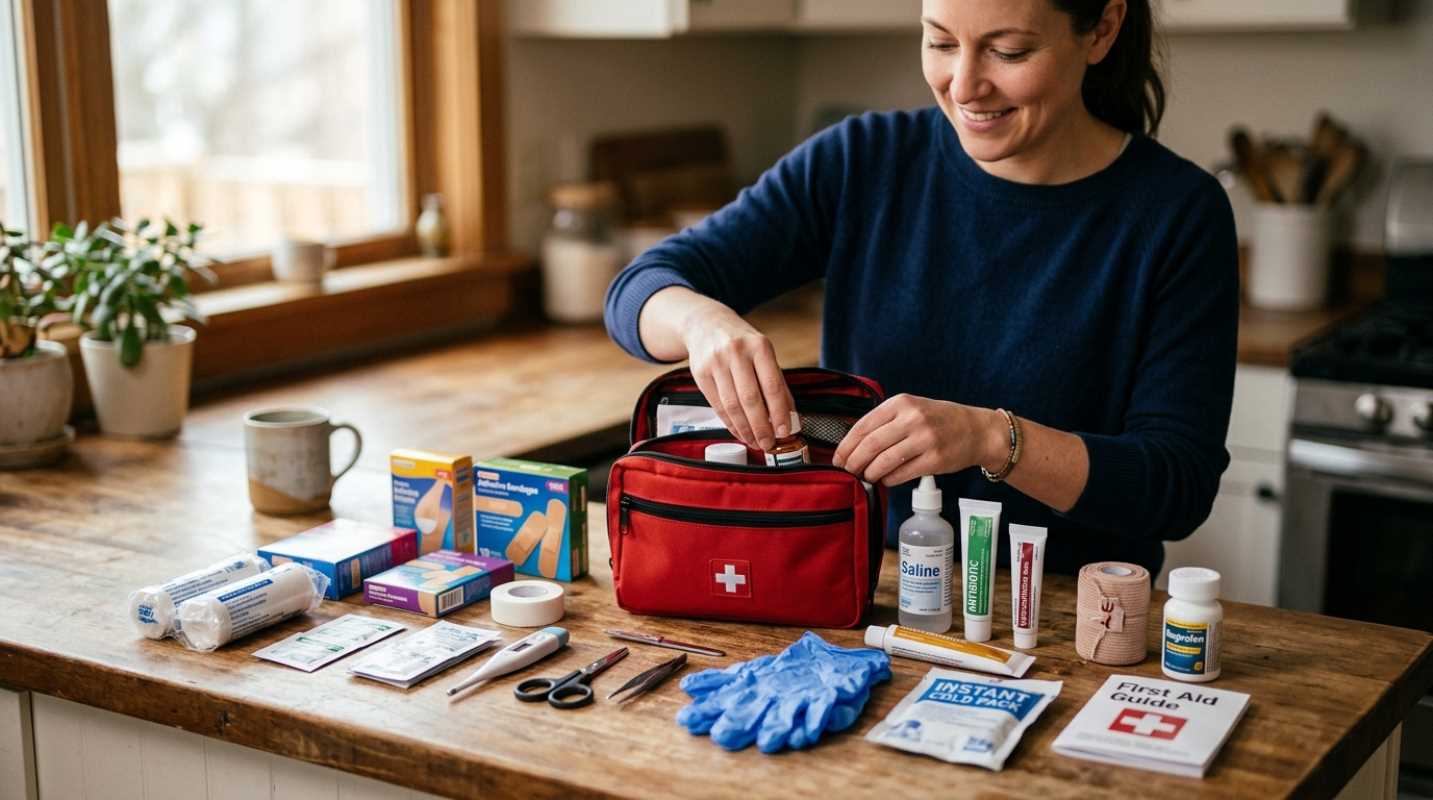
The Foundation Needed First-Aid Kit Supplies
A well-rounded medical kit rests on three main pillars: wound care, medications, and basic diagnostic tools. Buying cheap items in bulk might save a few dollars upfront, but poor medical tape that unsticks after five minutes won't help anyone. You want medical-grade supplies that hold up under pressure.
To keep your supplies organized when stress runs high, break down your foundational elements into clear, easy-to-grab categories
• Adhesive Bandages: Keep 25 to 30 latex-free bandages in various shapes, including knuckle, fingertip, and standard strip sizes.
• Sterile Gauze Pads and Rolls: Stock at least five 2x2 pads and five 4x4 pads for larger wounds, along with two rolls of conforming gauze wrap.
• Medical Tape: Store one roll of durable 1-inch cloth medical tape to hold dressings tightly in place.
• Antiseptic Cleansers: Include 10 to 12 antiseptic wipes and a small bottle of sterile saline solution to clean dirty wounds without burning skin.
• Topical Ointments: Pack single-use tubes of triple antibiotic ointment, hydrocortisone cream for rashes, and aloe vera gel for minor burns.
• Basic Medications: Keep pain relievers like ibuprofen, acetaminophen, and regular aspirin on hand, alongside diphenhydramine for sudden allergic reactions.
Treating Common Minor Injuries at Home with Confidence
Having supplies is only half the battle. You also need a simple system for treating everyday bumps, scrapes, and burns so you can react without panicking.
When dealing with a cut or scrape, always clean your hands first or put on protective nitrile gloves. Flush the wound gently with sterile saline or plain warm water. Skip the rubbing alcohol or hydrogen peroxide directly on open tissue, as those actually slow down the natural healing process. Apply a thin layer of antibiotic ointment to protect the skin barrier, then secure a sterile bandage over the top.
For minor thermal burns, run cool running water over the affected area for at least 10 minutes immediately. Avoid putting ice, butter, or heavy oils on a fresh burn because they trap heat against the skin. Apply a soothing hydrogel dressing or aloe vera gel, then cover the area loosely with non-stick sterile gauze.
So how do you know when an injury crosses the line from home care to emergency room care? Look out for these signs
1. Bleeding that does not stop after applying firm, direct pressure for 10 minutes.
2. Deep cuts that gape open or show underlying fat and muscle tissue.
3. Burns that form large blisters or affect sensitive areas like the face, hands, or major joints.
4. Signs of infection, such as spreading redness, pus, or persistent warmth around the wound.
Expanding Your Kit Beyond the Basics
If you want your kit ready for actual emergencies, you need to go beyond basic bandages. Modern preparedness standards now emphasize serious trauma gear that buys important time during major events. Severe bleeding can become fatal in as little as three minutes, which is usually much faster than an ambulance can arrive.²
Adding a manufactured windlass tourniquet and hemostatic gauze dressings allows you to handle catastrophic bleeding instantly.² Also, health experts now recommend keeping over-the-counter Naloxone nasal spray in every family kit to treat accidental prescription medicine overdoses or overdose emergencies.³
Specialized Tools and Household Customization
Every family has different health profile needs, which means no two home kits should look identical. You will want to customize your supplies depending on who lives under your roof
• Diagnostic Gear: Add a reliable digital forehead thermometer, a pulse oximeter for tracking oxygen levels, fine-tipped tweezers for splinters, and blunt-ended trauma shears.
• Prescription Backups: Keep at least a 7-day emergency supply of needed prescription medications, such as blood pressure pills, insulin, or EpiPens.
• Child-Specific Supplies: If you have infants or toddlers, include liquid acetaminophen with dosage syringes, a bulb aspirator, and oral rehydration salts.
• Senior and Chronic Care: Store a printed card listing medical conditions, surgical history, and current doctor contacts alongside an extra blood pressure cuff.
• Pet First-Aid Additions: Add self-adhesive elastic wrap that will not stick to fur, pet-safe antiseptic wipes, and tick removal tools.
Maintenance and Storage: Keeping Your Kit Ready
A first-aid kit is not something you build once and forget for a decade. Ointments dry out, medications expire, and sterile packages can lose their seal over time.
Set a recurring reminder on your phone to audit your kit twice a year. A good rule of thumb is to check your supplies whenever you adjust your clocks for Daylight Saving Time. Throw out any expired drugs, swap out old batteries in your flashlight or thermometer, and restock whatever supplies you used over the previous six months.
Where you store your kit matters just as much as what is inside it. Resist the temptation to keep your primary kit in the bathroom. The constant moisture and temperature changes from hot showers degrade medication potency and ruin bandage adhesives. Instead, store your supplies in a cool, dry, central spot like a hall closet or pantry.
Organize your items into clear, color-coded bags or pouches inside your main container. Like, use red for bleeding control gear, blue for oral medications, and yellow for general wound care. This simple visual system makes it easy for anyone in your family to grab exactly what they need during a high-stress emergency.
Your Path to Home Resilience
Building a home first-aid kit is one of the most practical steps you can take to protect your family. It shifts your household from reacting in panic to taking calm, effective action when accidents occur.
Take an hour this week to evaluate what you currently have on hand. Check expiration dates, toss useless items, and make a quick shopping list based on the standards outlined here. Pair your physical supplies with basic knowledge by signing up for a local CPR or Stop the Bleed class. Having the right tools ready and knowing how to use them builds a lasting culture of safety right inside your own home.
Sources:
1. PackFreshUSA Home Defense First Aid Checklist
https://packfreshusa.com/blog/your-homes-best-defense-the-musthave-first-aid-kit-checklist/
2. STOP THE BLEED
https://www.stopthebleed.org/
3. CHOC OTC Naloxone Narcan Nasal Spray Guide
https://health.choc.org/what-parents-should-know-about-over-the-counter-naloxone-narcan-nasal-spray/
*This article on seisim is for informational and educational purposes only. Readers are encouraged to consult qualified professionals and verify details with official sources before making decisions. This content does not constitute professional advice.*

 .jpeg)