Have you ever looked at your trash bin after prepping dinner and wondered where all those carrot tops, onion skins, and apple cores end up? You are not alone. In the United States, nearly 40% of the food supply ends up wasted every single year.¹ That translates to millions of tons of organic material heading straight for landfills, where it gets buried and breaks down without oxygen.
When organic matter decomposes without air, it releases methane, a greenhouse gas over 28 times more potent at trapping atmospheric heat than carbon dioxide over a century. Residential households actually generate almost half of all that food waste. Although that statistic might sound heavy at first, it means you have incredible power to fix the problem right from your own kitchen.
Instead of throwing those valuable nutrients away, you can transform them into dark, crumbly soil conditioner that gardeners call black gold. The best part? Composting is not nearly as difficult or messy as people assume. You do not need a science degree or an expensive setup to make it work. Once you learn a few basic principles, turning daily kitchen scraps into garden gold becomes second nature.
Beginner Composting Steps and Getting Started Without the Mess
Setting up your first composting system is straightforward once you know what to look for. You just need a suitable location, the right bin, and a basic understanding of how to balance your materials.
First, pick a good spot in your yard. An ideal location gets a mix of sunshine and shade. Sunlight helps warm up the pile so beneficial microbes can work quickly, while partial shade keeps the bin from drying out too fast during hot summer months. You also want to place the bin somewhere convenient. If it sits in a far corner of your yard, you will not want to walk out there on a rainy evening or in the middle of winter.
Next, choose a container that fits your available space and daily routine
• Open Wire Piles: Great for larger yards with plenty of autumn leaves, straw, and grass clippings.
• Tumbler Bins: Enclosed containers mounted on a stand with a rotation handle. They keep rodents out and make turning the pile simple.
• Worm Bins: Perfect for small spaces or indoor use, relying on Red Wiggler worms to break down food scraps fast.
• Bokashi Buckets: An indoor fermentation system that uses special microbes to break down scraps in an airtight container.
Once your bin is in place, you need to balance your materials using two basic elements: greens and browns. Greens supply nitrogen to feed the microorganisms breaking down the waste, while browns supply carbon, providing energy and air pockets.
To keep things simple, aim for a volume ratio of roughly two to four parts browns for every one part greens. A practical trick is to throw two big handfuls of crushed dry leaves or shredded cardboard into your outdoor bin every time you dump in a container of kitchen scraps.
The Master List of What to Compost and Avoid
Knowing what belongs in your bin is the secret to fast breakdown and zero unpleasant smells. Here is how to sort your household waste.
Nitrogen-rich green items to compost
• Vegetable Scraps: Squash peels, broccoli stalks, wilted salad greens, and potato skins.
• Fruit Scraps: Apple cores, melon rinds, berries, and citrus peels.
• Coffee Grounds: Rich in nitrogen and loved by soil microbes (paper filters can go right in too).
• Fresh Yard Trimmings: Green garden prunings and fresh grass clippings.
Carbon-rich brown items to compost
• Dry Leaves and Twigs: Fallen autumn leaves and small twigs chopped into small pieces.
• Cardboard and Paper: Unwaxed corrugated cardboard, plain paper bags, and egg cartons torn into small strips.
• Crushed Eggshells: Clean eggshells add valuable calcium to your finished soil mix.
Items to strictly avoid
• Meat, Fish, and Bones: These attract rodents, raccoons, and flies while creating foul smells.
• Dairy and Fats: Cheese, butter, and cooking oils break down slowly and create rancid odors.
• Pet Waste: Cat and dog manure contain harmful parasites that should never go near edible garden crops.
• Herbicide-Treated Plants: Yard waste treated with persistent chemicals can remain in the soil and damage future garden plants.
A great tip for beginners is the countertop bin hack. Keep a small bin full of torn cardboard strips right next to your kitchen scrap container. Putting a layer of shredded paper in the bottom of your countertop collector before adding fruit peels prevents liquids from pooling and keeps things tidy from the start.
Maintenance and Troubleshooting for a Healthy Pile
A well-maintained compost pile should smell fresh, like damp woods after a light rain. If your pile starts smelling bad or stops breaking down, do not panic. It usually means one of your basic elements is slightly out of balance.
Airflow is needed for a clean breakdown process. Microbes need oxygen to do their job properly. If a pile packs down tight, oxygen disappears, and anaerobic bacteria take over, which creates a sulfur or rotten egg smell. Turning your pile weekly with a pitchfork or spinning your tumbler fluff up the material and gets air moving again.
Moisture is another important factor. Your pile should feel like a wrung-out damp sponge. If it gets too dry, decomposition grinds to a halt. If it gets too wet, it becomes slimy and smelly.
Here is how to solve common issues quickly
• Rotten Egg Smell: The pile is too wet or lacks oxygen. Turn the pile immediately and mix in dry leaves, straw, or shredded paper to absorb moisture.
• Ammonia Smell: You have added too many nitrogen-rich green scraps. Add carbon-rich brown materials like sawdust or dry leaves and mix thoroughly.
• Slow Breakdown: The pile is either too dry, too cold, or missing nitrogen. Add water until damp, toss in fresh coffee grounds or grass clippings, and turn the pile.
• Pests and Fruit Flies: Scraps are sitting exposed on top of the pile. Always bury fresh food scraps 8 to 12 inches deep under a cap of dry leaves or shredded cardboard.
Chopping your kitchen scraps into one-inch pieces before tossing them out can speed up decomposition by up to three times. Smaller pieces give beneficial microbes much more surface area to work on.
Using Compost in Home Gardens for Maximum Impact
After three to six months of simple maintenance, your hard work will pay off. How can you tell when your compost is ready to harvest?
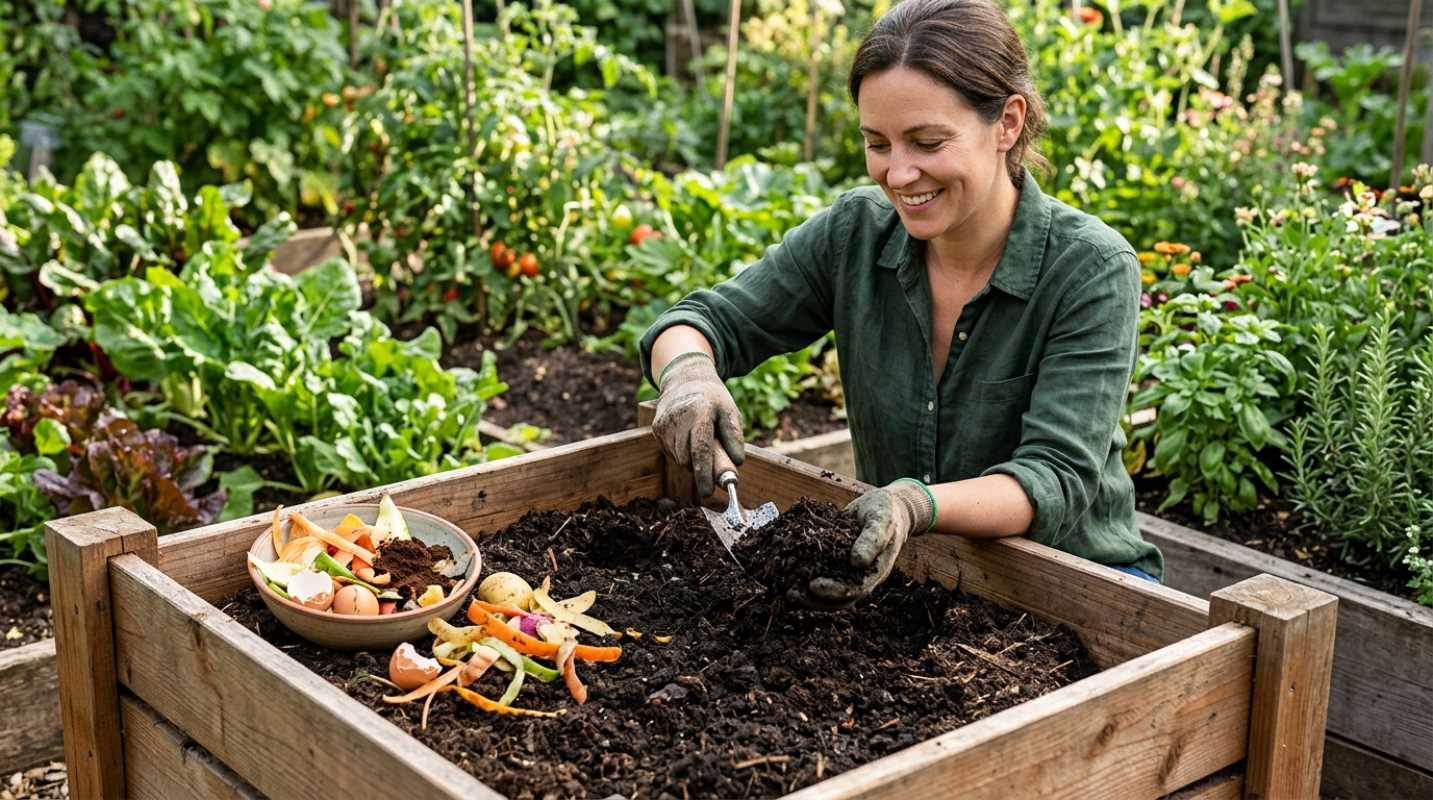
Finished compost is deep, dark brown, crumbly, and cool to the touch. It smells clean and earthy, like a forest floor. You should not be able to identify any original food scraps or dry leaves in the finished material.
You can apply your fresh compost using a few easy methods
• Top-Dressing: Spread a one-to-two-inch layer over garden beds or around the base of bushes. Rain and natural earthworms will pull those nutrients down into the soil.
• Soil Amendment: Mix finished compost directly into the top six inches of native soil when setting up new raised beds or planting garden seedlings.
• Potting Mix Boost: Blend one part compost with two parts standard potting soil to give container plants a nutrient boost.
Regularly adding compost builds rich soil structure over time. It helps sandy soils hold onto moisture during dry spells and breaks up dense clay soils, so plant roots can breathe. Diverting organic waste away from landfills has increased significantly in recent years as more homeowners learn how simple the process really is.² By turning daily kitchen waste into garden gold, you reduce your personal environmental footprint while building a growing garden right outside your back door.
Sources:
1. EPA - Composting at Home
https://www.epa.gov/sustainable-management-food/composting
2. ReFED - Data and Impact
https://refed.org/uploads/pact-data-report-2025-final.pdf
3. Moonshot Compost Resources
https://www.moonshotcompost.com/support/resources/impact